Free Crochet Baby Cocoon Pattern
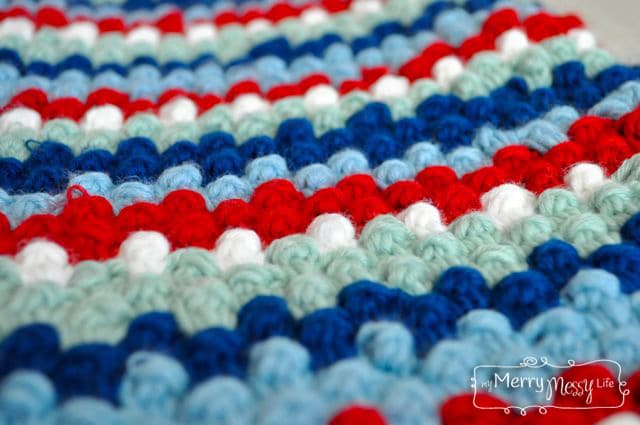
Here's a free crochet baby cocoon pattern that uses the raspberry stitch, which gives it an incredible texture and look. The colors used here are perfect for a baby boy, but they can be changed for a girl, too. I love the scalloped pattern that the raspberry stitch makes!

I'm so pleased with how my newest baby cocoon pattern turned out – the colors are gorgeous and it's so incredibly soft with a 50% wool and 50% acrylic blend. And the raspberry stitch is so easy to work and makes a beautiful pattern when you change colors often. This will look so good in pictures once our baby arrives! I learned the raspberry stitch from this video – it's a single crochet, double crochet, single crochet worked into one space.
Free Crochet Baby Cocoon Pattern – with the Raspberry Stich
Materials
- Hook: J-10, 6 mm
- Yarn: I used Martha Stewart Crafts from Lion Brand Yarn – Extra Soft Wool Blend in Sailor Blue Holly Berry , Winter Sky, Buttermilk, and Green Eucalyptus but they no longer make it! So I recommend these yarns below. They are soft wool, worsted weight. I really liked using wool – breathable for the baby, durable, natural, and soft.
Abbreviations
- SC = single crochet
- HDC = half double crochet
- DC = double crochet
- CH = chain
- SL ST = slip stitch
- RBS = raspberry stitch
- SP = space
Pattern
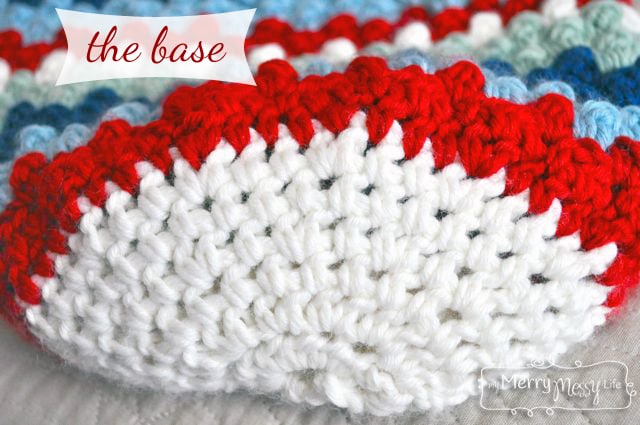
This free crochet baby cocoon pattern is worked from the bottom up. We will start with the base and then work the sides.
Base of Cocoon – all worked in Buttermilk (cream) yarn
Row 1
- CH 3
- Join with a SL ST to make a ring
- CH 2 (counts as first HDC)
- Work 11 HDC in ring (12 HDC total)
- Join to top of CH 2 with a SL ST
Row 2
- CH 2
- Work 2 HDC in each SP (24 total)
- Join to beginning CH 2 with a SL ST
Row 3
- CH 2
- Work 1 HDC in each SP (24 total)
- Join to beginning CH 2 with a SL ST
Row 4
- CH 2
- 1 HDC in the same SP (2 total)
- 1 HDC in the next SP
- *2 HDC in the next SP
- 1 HDC in the next SP
- Repeat from * all the way around (36 total)
- Join to beginning CH 2 with a SL ST
Row 5
- CH 2
- 1 HDC in each SP (36 total)
- Join to beginning Ch 2 with a SL ST
Row 6
- CH 2
- 1 HDC in the same SP (2 total)
- 1 HDC in each of the next 2 SP's
- *2 HDC in the next SP
- 1 HDC in each of the next 2 SP's
- Repeat from * all the way around (48 total)
- Join to beginning CH 2 with a SL ST
Row 7
- I changed to Holly Berry here (red) and attached with a SL ST
- CH 2
- 1 HDC in the same SP (2 total)
- 1 HDC in each of the next 3 SP's
- *2 HDC in the next SP
- 1 HDC in each of the next 3 SP's
- Repeat from * all the way around (60 total)
- Join to beginning CH 2 with a SL ST
Row 8
- CH 2
- 1 HDC in the next SP
- 1 HDC in each SP around (60 total)
- Join to beginning CH 2 with a SL ST
Row 9 – Start the Raspberry Stitch
- CH 2
- 1 DC & 1 SC in the same SP
- Skip 2 SP's
- Work an RBS
- *Skip 2 SP's
- Work an RBS
- Repeat from * all the way around (20 RBS's total)
- Join to beginning CH 2 with a SL ST
Row 10
- I switched to Winter Sky (light blue) here, attach with a SL ST in between 2 of the RBS's
- CH 2 or work a SC
- 1 DC & 1 SC in the same SP
- Work a RBS in the next SP & in each SP all the way around (in between the RBS's) (20 RBS's total)
- Join to beginning CH 2 or SC with a SL ST
Repeat row 10 for the length of the entire cocoon – I worked 70 more rows.
Finished size is 8 inches wide by 22 inches long, including the base.
Crochet Baby Layette Set
Make this free crochet baby cocoon pattern with the matching crochet baby layette set – all free patterns here on my blog!
[optin-monster slug=”xs2yggdkacqf5ww9fqqm”]
Love your patterns