Crochet Lacy Shawlette, Shrug and Wrap – Free Pattern
A free crochet pattern for a summery shawlette – it's a shawl, shrug and wrap all in one! The yarn is a combo of cotton and acrylic, so it's so soft and thinner than a worsted weight, making it excellent for warm weather accessories. And the color choices are so vibrant and rich!
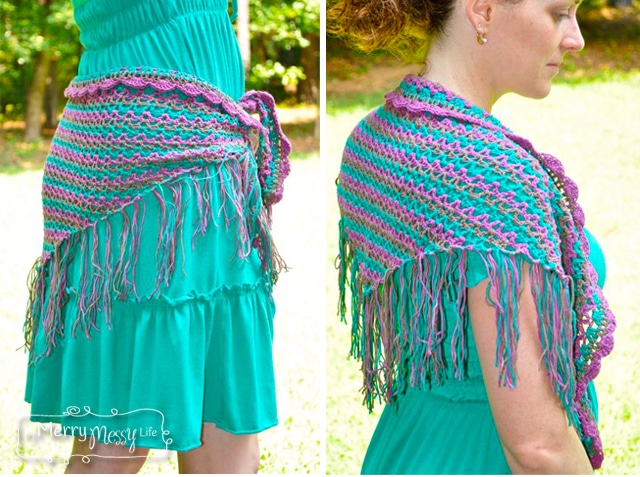
It has a feminine shell edge that gives it a collar, which curls around the neck. I think it's great to wear as an accessory with a dress as a shawl or shrug, but is also cute to wear around the waist as a wrap for all kinds of dance classes like zumba, belly dancing, latin ballroom, and even before yoga or ballet class or to teach dance classes! At least, that's how I'd wear it as a dance teacher myself! I'd even wear it as a swimsuit coverup on the beach, but lord knows you'd never find me posing on the blog like that! Ha! It's bad enough you have to see my non-existent modeling skills here.
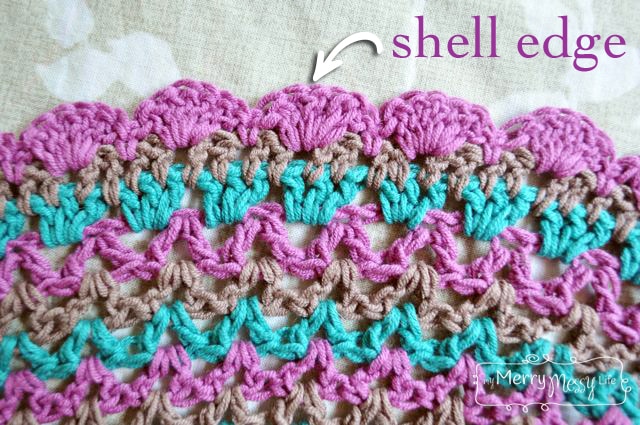
Crochet Pattern for Summery Shawlette
Materials
- Crochet Hook: G/6 or 4 mm hook
- Yarn Weight: (3) Light/DK (21-24 stitches to 4 inches)
- Yarn: Bernat Cottonish in Jade Jersey, Cotton Jin, and Coffee Filter (1/2 skein each)
Abbreviations
- CH = chain
- DC = double crochet
- SP = space
- SK = skip
- SL ST = slip stitch
- V-Stitch = double crochet, chain 1, double crochet in same space (see my full v-stitch tutorial here)
Some helpful notes:
You create the triangle shape by decreasing on each row (1 v-stitch on each side), but instead of working a decreasing stitch, I just started each row 1 stitch closer in. I wrote this pattern to change colors each row and added fringe so those tails do not have to be sewn in (yay!).
Color Pattern – Cotton Jin, Coffee, Jersey Jade, repeat
The Pattern
Row 1
- CH 173 (or any multiple of 4, plus 1)
- In the 4th CH from the hook, work v-stitch
- SK 2 CH
- Work a v-stitch in the next CH
- Repeat from * all the way down, ending with a v-stitch
- Fasten off and leave a long tail (about 6 inches)
- (56 v-stitches worked)
Row 2
- (new color) SL ST to the top of the DC
- CH 3
- SK the first v-stitch, and work 1 v-stitch in the CH 1 SP of the next v-stitch
- Work 1 v-stitch in each CH 1 sp of the previous v-stitch until the last v-stitch
- CH 3 and attach with a SL ST to the top of the beginning CH 4
- Fasten off and leave a 6-inch tail
Rows 3-29
- (new color) ST ST to the top of the first half of the v-stitch (the first DC)
- CH 3
- SK that first v-stitch (that you just worked the sl st into), and work 1 v-stitch in the CH 1 sp of the next v-stitch
- Work 1 v-stitch in each CH 1 sp of the previous v-stitch until the last v-stitch
- CH 3 and attach with a sl st to the top of the very last dc
- Fasten off and leave a 6-inch tail
For row 30, you'll only be working 1 v-stitch, so:
- SL ST
- CH 3
- v-stitch
- CH 3
- SL ST
For the top edge and scallop
Attach a new color (I did Jersery Jade) back at the start of your shawlette, to the original chain.
Row 1
- Attach with a SL ST (leaving a 6 inch tail), CH 3
- SK the first V stitch (note: it's upside down), and work 3 DC's in between those 1st and 2nd v-stiches.
- *3 DC in between the next 2 v-stitches
- Repeat from * all the way down
- CH 3 and sl st in between the original DC and that last v-stitch
Row 2
- (switch colors)
- Attach with a SL ST & ch 3 to the top of the previous CH 3
- Work 1 DC in each space all the way down (so there will be 1 DC in between each dc of the granny stitches and 2 DC's in each granny stitch itself
Shell/Scalloped Edge
- (switch colors)
- Attach with a SL ST
- *SK 2 DC
- Work 6 DC in the next sp
- SK 2 DC
- SC in the next SP
- Repeat from * all the way down. If you accidentally end up with a couple less or more spaces at the end, just finish it off with a SC in that very last space. The edge is very forgiving and it won't be noticed by anyone but you.
To Make the Fringe
- Cut 3 strands of yarn (I did 1 of each of the 3 colors) 12 inches long
- Fold in half
- Tie to each of the DC spaces along the edge of the scarf by looping the ends through the loop created by folding it in half.
Here's what the shawl looks like from the front, with the collar that curls up. It could be buttoned across the chest to create a shrug, too!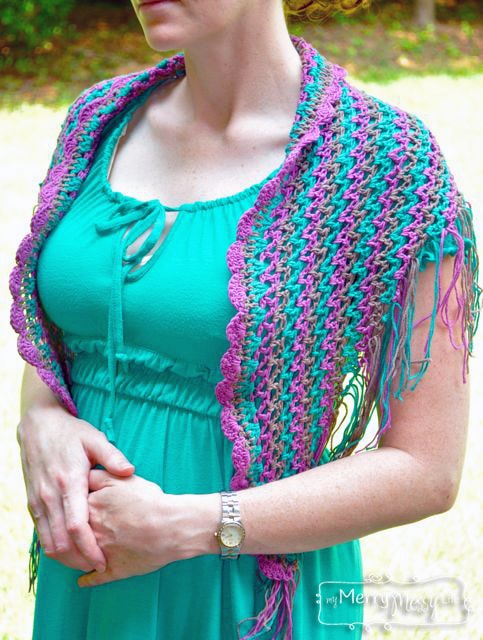
Here's a detailed view of the stitching with a v-stitch. It works up very quickly with this stitch and is easy enough for a beginner to do. I have a full photo tutorial to show you how to do the v-stitch as well!
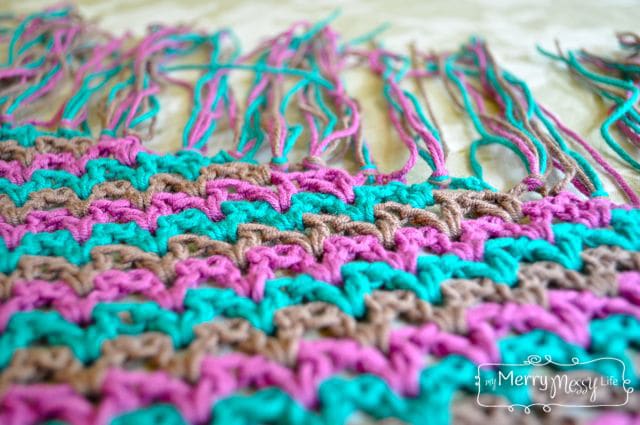
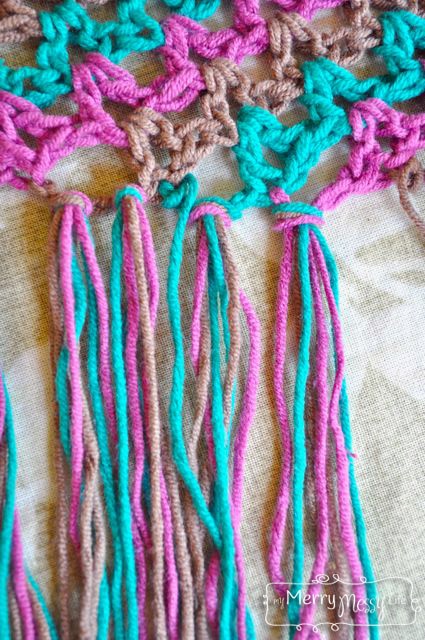
I love colorful pieces, so I wanted the shawlette to change colors at every row but did NOT want to weave in all those ends. So, I left the ends long at 6 inches and turned them into fringe! I then had to add fringe to it but cutting 12 inch strands, folded them in half, and worked a knot over the edge with three strands at a time.
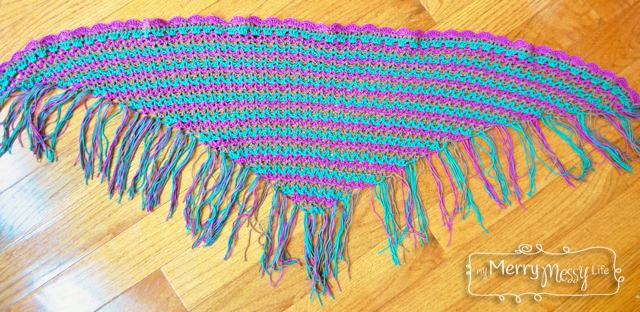
And here's the whole thing to help you visualize what it looks like completed.
Don't forget to check out my Crochet V-Stitch Photo Tutorial if you need help with the stitching of this piece!
Also, see the other pattern I wrote with this yarn – Crochet Clover Lattice Summer Cowl

[optin-monster slug=”xs2yggdkacqf5ww9fqqm”]

