Free Crochet Baby Headband Pattern – Seed Stitch
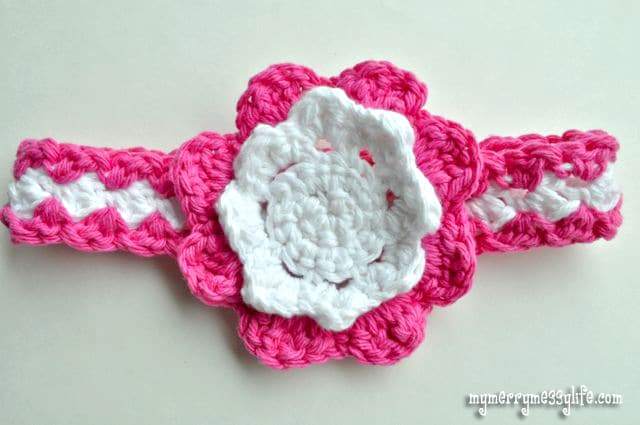
A free crochet baby headband pattern with large flower using the crochet seed stitch. This is so adorable on your little one you'll never want her to be without it. The crochet pattern is easy enough for a beginner and uses the seed stitch.
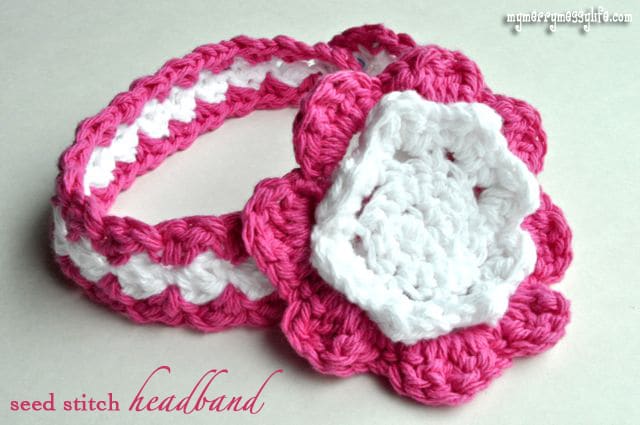
I Love the Crochet Seed Stitch!
After making the adorable Seed Stitch Purse, I really wanted to try the seed stitch again to make a headband. I love this stitch because it creates a nice texture and has a wavy look to it.
My Favorite Crochet Baby Headband Pattern
This turned out to be such an adorable headband, and my favorite crochet baby headband pattern so far! I tried it on Grayson and I giggled, which made him giggle, of course, because it was beyond precious on him. I considered showing pictures of him with it on, but that might come back to bite me in the butt one day when he finds out I've been blasting pictures of him in girly things on the internet.
Here's the PDF for nice, neat printing.
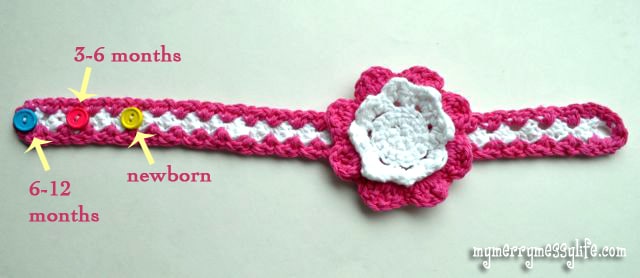
It works up very quickly, and can be adjusted to any size. This particular one is long enough to fit a 6 months to 2 years (17 inches long), but I sewed buttons onto it so it can also fit a newborn, and 3-6 month old baby, so it's quite functional.
Crochet Headband Measurements
- Newborn 13″
- 3-6 months 14″
- 6-12 months 16″
- 12 months-tween 17.5″
- Adult 18″
Crochet Baby Headband Pattern using the Seed Stitch
Written by Sara McFall of My Merry Messy Life
Materials:
- Yarn: Worsted Weight, I used Sugar'n Cream cotton yarn in Hot Pink and White
- Hook: I, 5.5 mm
- Tapestry needle to sew in tails
- 3 buttons
Abbreviations:
- SL ST = slip stitch
- DC = double crochet
- SC = single crochet
- CH = chain
- ST = stitch
- SP = space
- (starting with white yarn)
- CH 46 (or make it longer or shorter, as long as the number of chains is divisible by two)
- In the 2nd CH from hook, work 1 SC and 1 DC in the same ST
- Skip 1 CH
- *Work 1 SC and 1 DC in the next CH
- Skip 1 CH*
- Repeat from * until you reach the end.
- Fasten off.
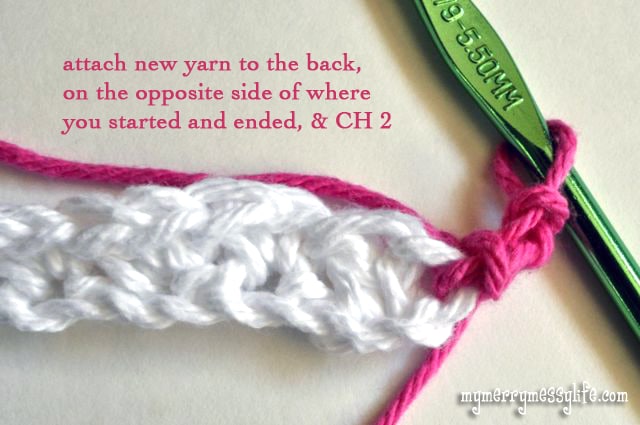
(using another color)
Attach new color to the opposite end from the SL ST (where you started) and on the back side. The front side puckers out a bit, so we want to work on the back side so the new color will pucker on the same side as the white.
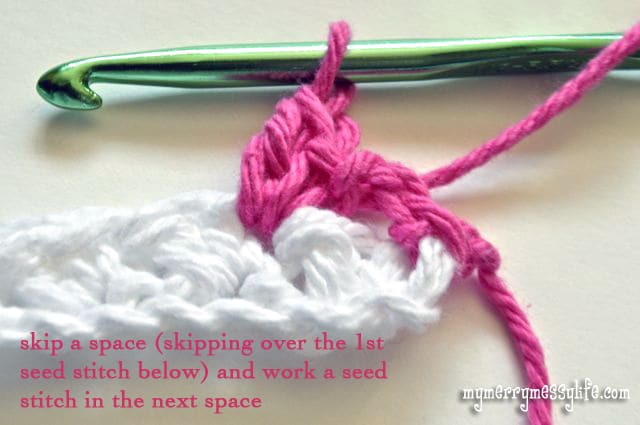
- CH 2
- *Skip the next sp
- SC, DC in next space*
- Repeat all the way down
- Work 3 sc on the end
- Turn work and repeat * above all the way down, working 3 sc on that end . Join with a SL ST to the beginning CH 1 and fasten off.
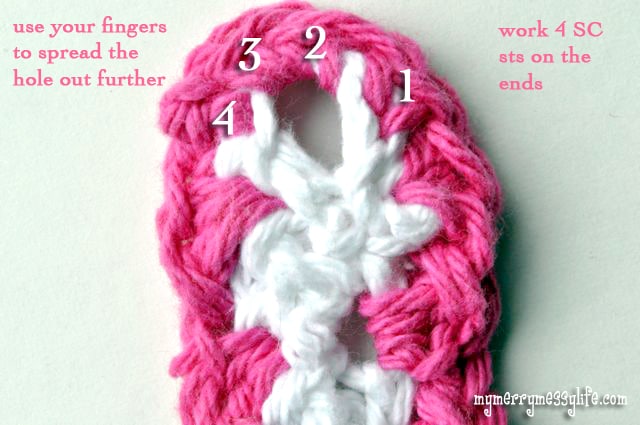
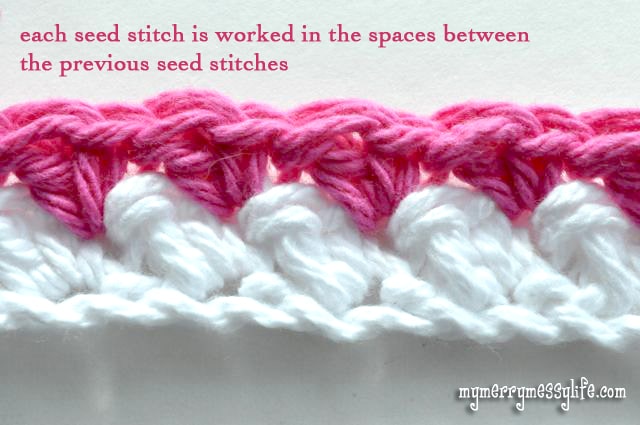
I found the flower pattern on Lion Brand. It's an Irish Rose, however, I did not do the third layer because it makes the flower huge and I thought would be too big for a baby's head.
Sew the rose onto your headband, using the same color as the middle color (white in this case), and then it will be an invisible join!
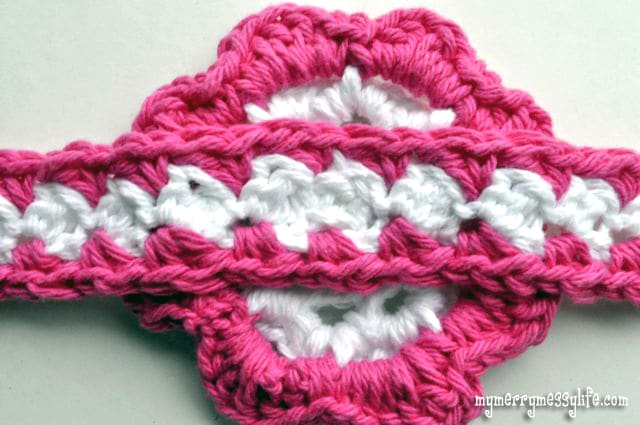
Measure out where you want your buttons, and sew them on using the same color thread as the middle color (white).
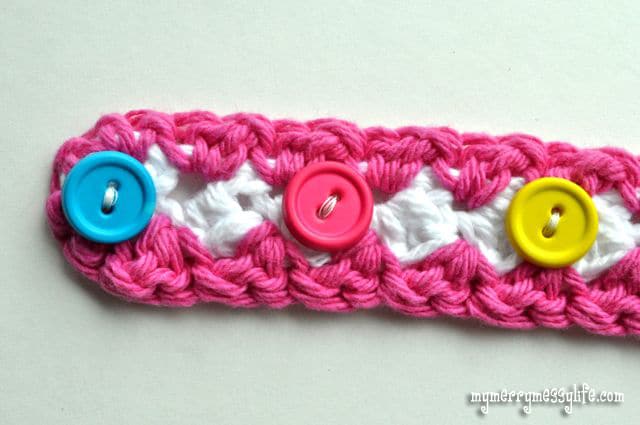
Ta-da! Et voila! C'est fini! I hope you enjoyed this crochet baby headband pattern. Was this your first time learning the seed stitch?
Merry Crocheting!
Hi do you have the pattern for the rose as the link to lion brand does not work and I’ve looked on they’re website and I can’t find
Hi Sofie! Ah yes, the yarn might no longer be made anymore. Any worsted weight yarn will work, though.
Hi, I find it very difficult to locate free patterns on your sight. Why do you not allow customers to copy and paste into Word? This would help in having to print from your sight do to the adds mixed in.
You always have good patterns.
Thank you.
Janet