Free Crochet Toy Bag Pattern
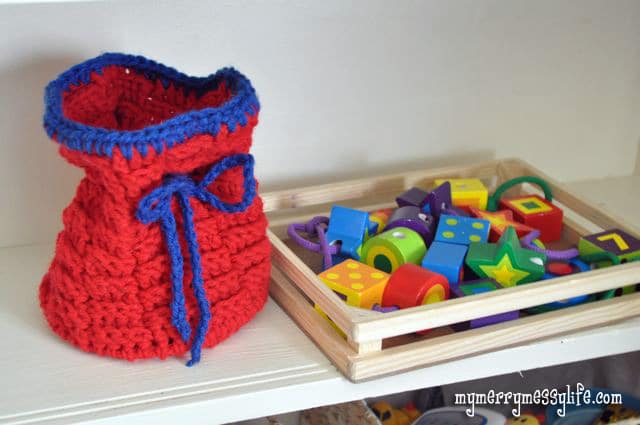
Here's a free crochet toy bag pattern you can make to hold your child's favorite trinkets. It keeps your shelves free of clutter and you can make it to match your decor!

The Kids' Toys are Everywhere!
My kids have these cheerful lacing blocks and beads from Melissa and Doug toys (get them here on Amazon), but the wooden crate in which they come is neither stackable nor convenient in which to house them. You know what that means – perfect crochet project opportunity!
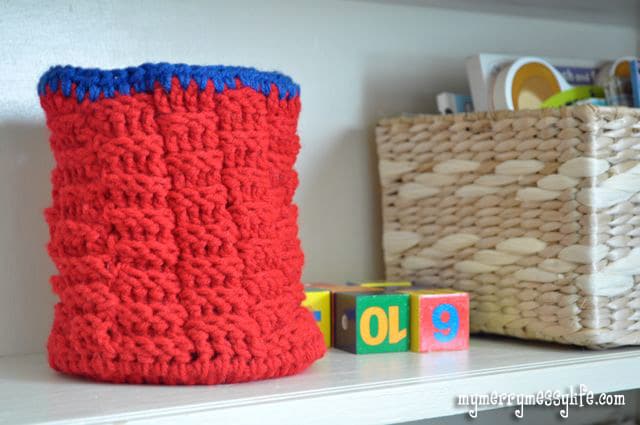
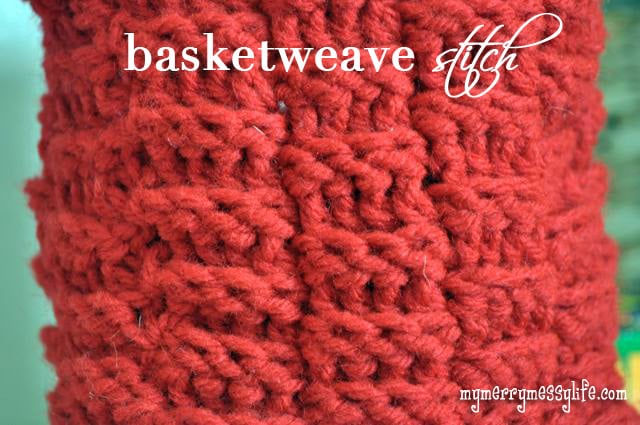
This time I didn't want to go with the traditional double, half double or single crochet. So, this basket/bag is created using my own version of the basket weave stitch, for which I've provided a tutorial! The basket weave stitch is such a strong, sturdy and interesting stitch. It looks as if you've really created a basket! This bag could be used for a myriad of things and can easily be made smaller or larger by adding rounds to the base.
See My Crochet in the Round Tutorials
If you've never crocheted in the round before, see my tutorials here on the blog for crocheting in the round and how to create invisible seams in the round first.

Free Crochet Toy Bag Pattern
Written and designed by Sara McFall of My Merry Messy Life
Materials
- Hook: G/6 4.25 mm
- Yarn: Worsted, Medium, 4
- I used Red Heart Super Saver Yarn in Red and Royal Blue
- Tapestry needle to sew in tails
- Scissors to cut the tails
A note about the yarn – I do like to use the stiffer Red Heart Super Saver yarn for this crochet toy bag pattern because it helps the basket to stand up and makes it strong enough to actually hold objects. The softer yarns are wonderful for hats, scarves and clothing, but not so great for baskets.
Abbreviations
- SL ST = slip stitch
- DC = double crochet
- FPDC = front post double crochet
- BPDC = back post double crochet
- CH = chain
- ST = stitch
Work the Base
The first CH 2 in every round counts as the first double crochet.
Round 1:
- CH 3
- SL ST to form a ring
- CH 2
- 7 DC in ring
- Join with a SL ST to top of CH 2 (8 total DC)
Round 2:
- CH 2
- DC in same ST
- 2 DC in each ST around
- Join with a SL ST to top of CH 2 (16 total DC)
Round 3:
- CH 2
- DC in same ST
- 1 DC in the next ST
- *2 DC in the next ST
- 1 DC in the next ST*
- Repeat from * to *
- Join with a SL ST to top of CH 2 (24 total DC)
Round 4:
- CH 2
- DC in same ST
- 1 DC in the next ST
- 1 DC in the next ST
- *2 DC in the next ST
- 1 DC in the next ST
- 1 DC in the next ST*
- Repeat from * to *
- Join with a SL ST to top of CH 2 (32 total DC)
Round 5:
- CH 2
- DC in same ST
- 1 DC in the next ST
- 1 DC in the next ST
- 1 DC in the next ST
- *2 DC in the next ST
- 1 DC in the next ST
- 1 DC in the next ST
- 1 DC in the next ST*
- Repeat from * to *
- Join with a SL ST to top of CH 2 (40 total DC)
Round 6:
- CH 2
- DC in same ST
- 1 DC in the next ST
- 1 DC in the next ST
- 1 DC in the next ST
- *2 DC in the next ST
- 1 DC in the next ST
- 1 DC in the next ST
- 1 DC in the next ST
- 1 DC in the next ST*
- Repeat from * to *Join with a SL ST to top of CH 2 (48 total DC)
Round 7:
- CH 2
- 1 DC in each ST around (48 total DC)
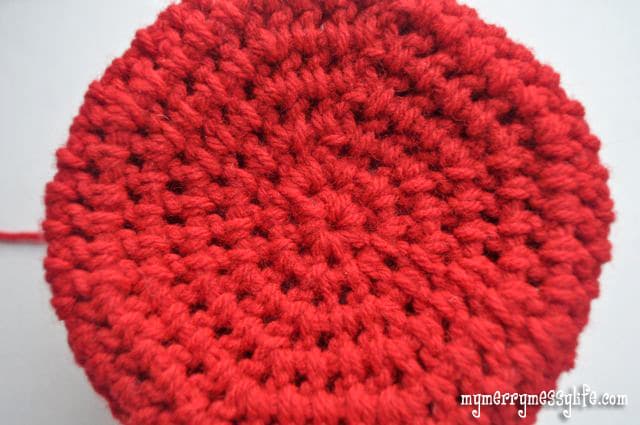
The bottom of your bag or basket will look like this:

Continue in this manner, adding more rounds where you add an increasing stitch (the 2 DC's in each stitch) one less time every round, if you wish for your bag to be larger than mine. Otherwise, follow below. If you follow my tutorial on crocheting invisible seams in the round, you should have a nice, clean base with no gaps where the round stops and starts.

Modified Basket Weave Stitch (sides)
If you've never worked with the Front Post Double Crochet and Back Post Double Crochet before, see my tutorial first. Then, you'll be able to work the basket weave stitch.
Rounds 1-16:
- CH 1
- Work a FPDC on the post directly below the CH 1.
- Work 1 FPDC on each of the next 3 posts below.
- *Work 1 BPDC on each of the next 4 posts below.
- Work 1 FPDC on each of the next 4 posts below.*
- Repeat from * to * and join with a SL ST to the previous CH 1
- Finish off the top with 1 HDC in each stitch around (48 total), or maybe a shell stitch if this is for a girl. If you'd like it to be a bag, make a chain of about 80 and weave it through the back where you'd like it.
Merry Crocheting!
Check my other FREE crochet patterns by clicking on “Crochet” at the top of this page!
- Crochet Baby Cocoon – Free Pattern
- Granny Stitch Sun Hat for a Baby Girl
- Crochet Chunky Basket – Free Pattern
[optin-monster slug=”xs2yggdkacqf5ww9fqqm”]

Love to try new patterns,