Free Crochet Cluster V-Stitch Tutorial
A free crochet v-stitch tutorial to learn how to work the cluster v-stitch. I used this stitch to make a baby blanket for our second child and it was the first crochet project I ever created, so even a beginner can learn this lacy, yet strong stitch!
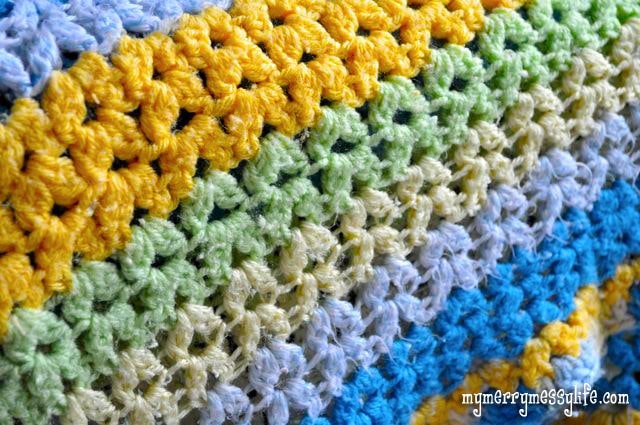
Use this Crochet V-Stitch Tutorial to Make a Baby Blanket
I used this cluster v-stitch crochet tutorial to make this baby blanket that I made for our second son, Grayson. If you've never done it before and like picture tutorials, you've come to the right place!
The cluster v-stitch is very similar to the v-stitch (see my tutorial for that here), but it is just thicker. It's a great stitch for making a blanket that's strong, but lacy. It was perfect to make Grayson's blanket because he was born in the spring and didn't need a thick one.
Free Crochet Cluster V-Stitch Tutorial
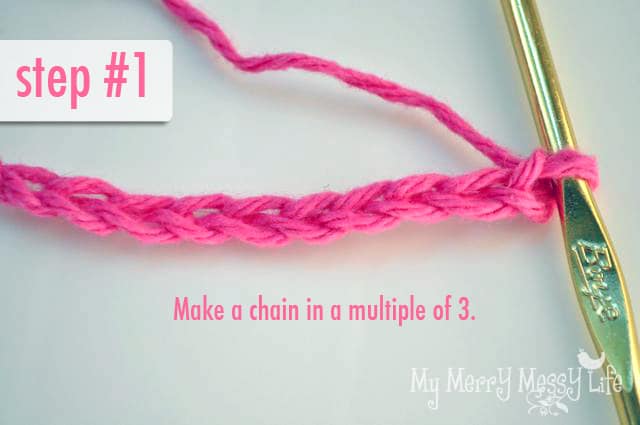
Step #1
Make a chain in a multiple of 3. The length will depend on your project, but for the baby blanket, I made a chain of 84.
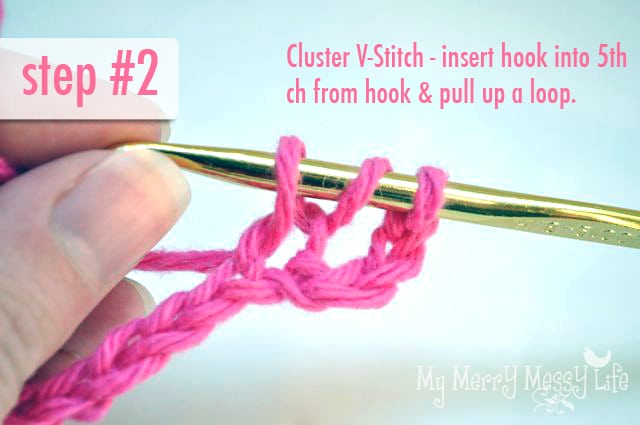
Step #2
Begin the cluster v-stitch. Insert your hook into the 5th chain from the hook (not counting the loop on your chain) and pull up a loop. There will be 3 loops on your hook.
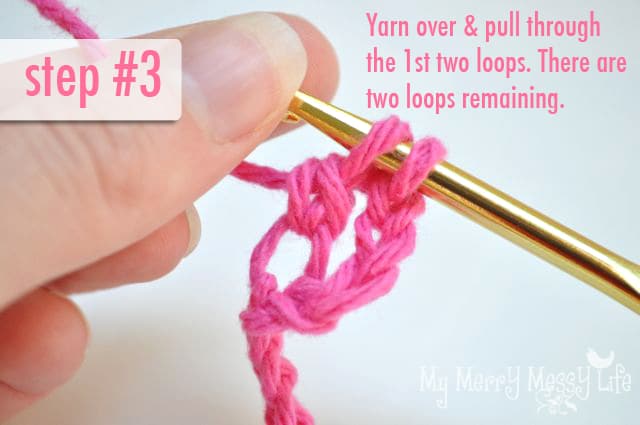
Step #3
Yarn over the hook and pull the yarn through the first 2 loops on your hook. There are two loops remaining.
Step #4
Yarn over and insert the hook back into the original chain again and pull up another loop. There will be 4 loops on your hook.
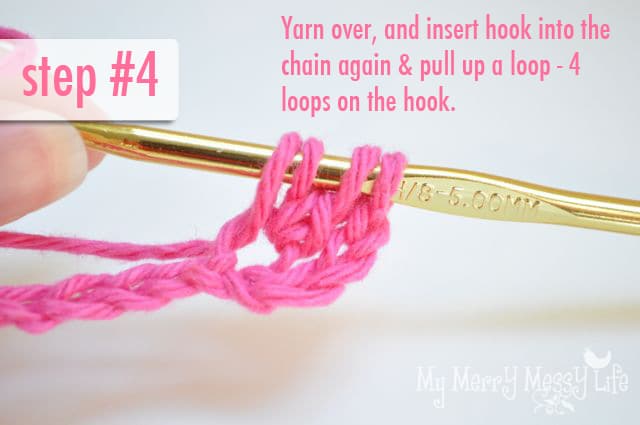
Step #5
Yarn over and pull through the first 2 loops. 3 loops remain.
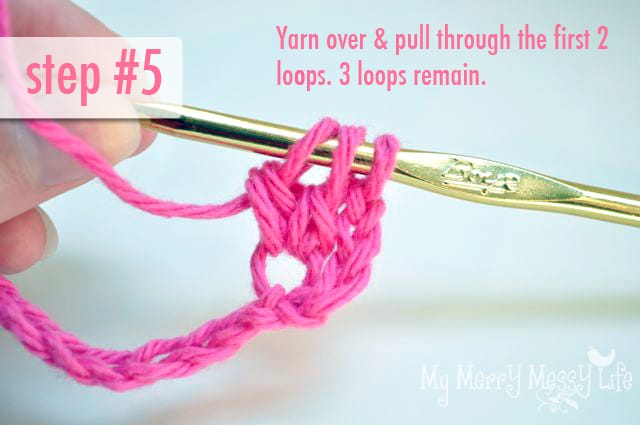
Step #6
Yarn over and pull through the last three loops. One side of the cluster-v stitch is finished!
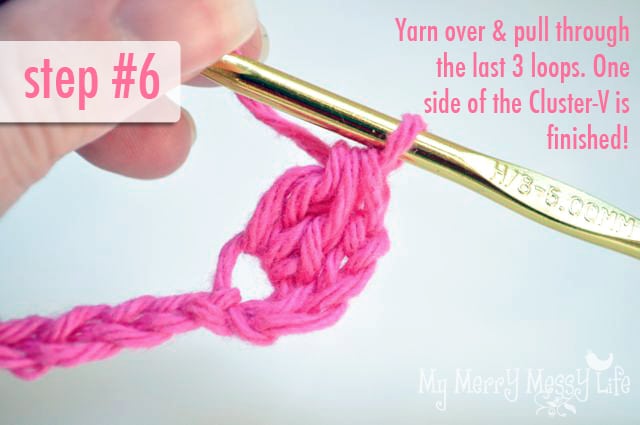
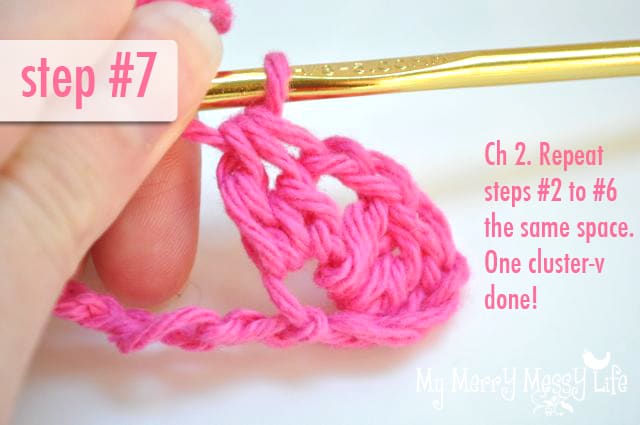
Step #7
Chain 2. Repeat steps #2 to #7, eliminating the first part of #2 (insert hook into 5th ch from hook) in the same chain space.
Yarn over and insert hook into the chain and pull up a loop (3 loops remain). Yarn over and pull yarn through the first 2 loops (2 loops remain). Yarn over and insert hook into the same chain space again and pull up a loop (4 loops remain). Yarn over and pull through the first 2 loops (3 loops remain). Yarn over and pull through the last 3 loops.
Step #8
Skip two chains and repeat the cluster v-stitch again.
Yarn over and insert hook into the chain and pull up a loop (3 loops remain). Yarn over and pull yarn through the first 2 loops (2 loops remain). Yarn over and insert hook into the same chain space again and pull up a loop (4 loops remain). Yarn over and pull through the first 2 loops (3 loops remain). Yarn over and pull through the last 3 loops.
Chain two. Repeat above.
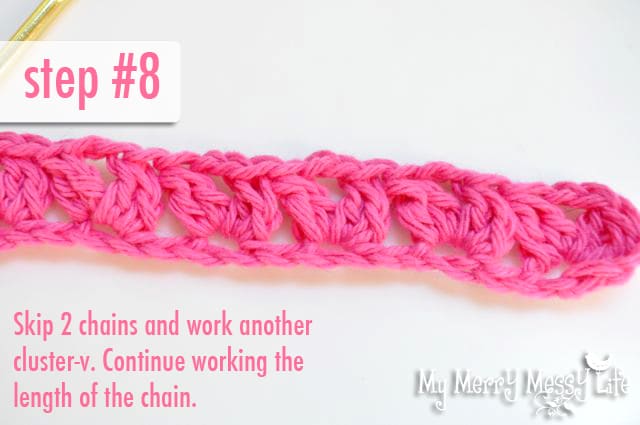
Finish the row with a double crochet in the last chain.
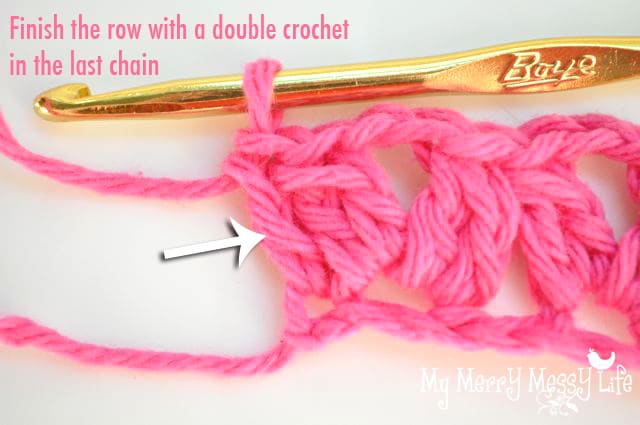
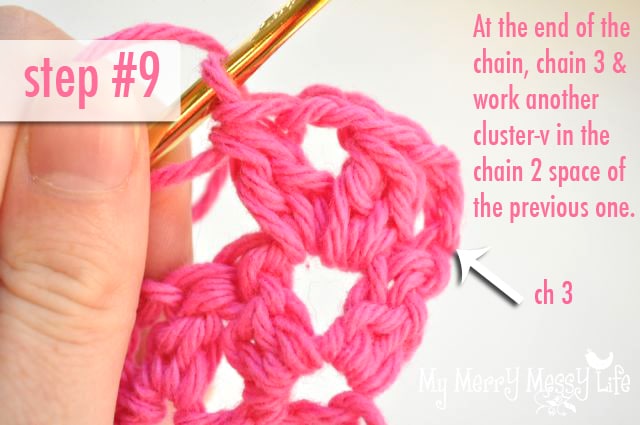
Step #9
After the last double crochet and at the end of the chain, chain 3 and work another cluster-v stitch in the chain 2 space of the previous one.
Step #10
Continue working the crochet cluster-v stitch in the chain 2 spaces the length of your work. Finish each row with a double crochet at the top of the first chain 5.
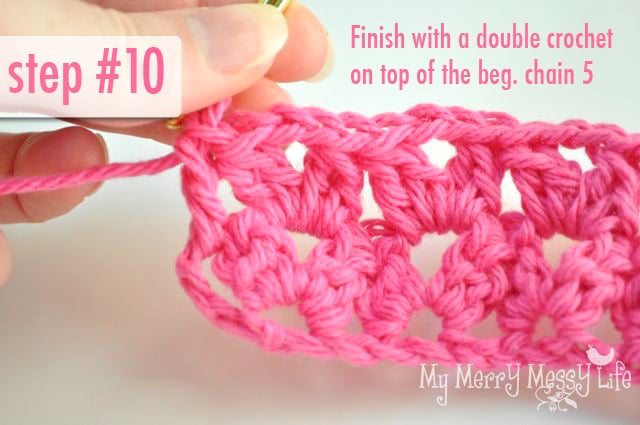
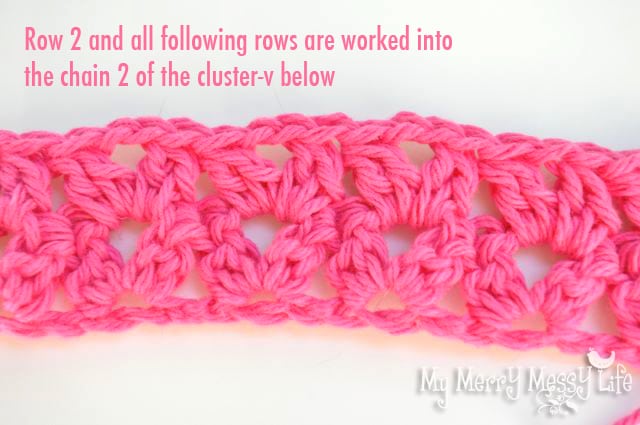
Row 2 and all the following rows are worked into the chain 2 space of the cluster-v from the row below. Each row is started with a chain 3 and finished with a double crochet at the top of the previous chain 3.
Click here to use the crochet cluster v-stitch pattern to make a summer baby blanket!
Merry Crocheting!

What is my problem….I’m using an I hook as recommended on the yarn label but my project is all curled.
Hi Ellen! I’m not sure – I’d need more details or to see a picture but it sounds like you are pulling too tightly or might be missing some stitches.
I love your photo tutorial. Your photography makes it so easy to see exactly how to place hook. I seem to have a lot of trouble with patterns these days (aging brain cells). I actually made a sample from it and definitely plan on making a blanket with this stitch thanks to you.
Hi Leslie! Oh, I’m so glad the tutorial works for you and helps you! Thanks for stopping by to leave a nice comment, they’re always appreciated!