Free Crochet Owl Amigurumi Pattern
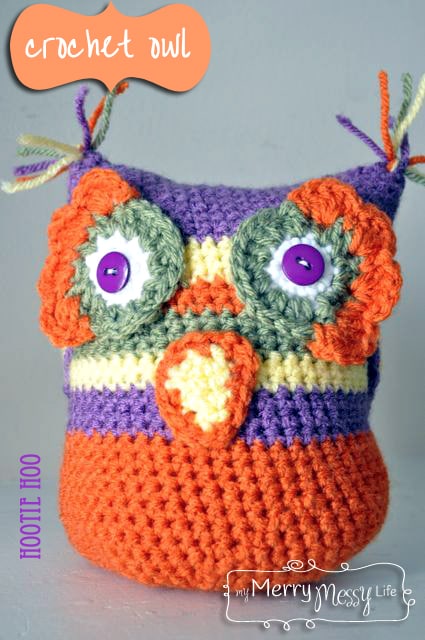
Here's a sweet and pretty crochet owl amigurumi pattern to cheer up your home for the fall! She would also make an adorable stuffed animal or baby toy. It comes with a free crochet pattern!
This Pretty Owl is Part of a Fall Crochet Set!
There's a new cheerful friend sitting on our mantel these days, and she matches perfectly with my fall crochet bunting. She looks down upon us with her perfectly curled, long lashes and cheers us up with her bright colors. What shall I name her? Leave a comment if you've got a great idea!
My Inspiration
I got my inspiration for her from an Etsy pattern at AshTree Crochet and from another fabulous Sarah (smile) and fellow crochet buddy at Repeat Crafter Me. Both the patterns make adorable little owls, so I set out to make my own, but didn't use their patterns and decided to wing it (too tired to read patterns at night while I crochet).
This Crochet Owl Amigurumi Pattern is Simple!
So, this crochet owl amigurumi pattern is simple – just an upside down hat that you stuff and then whip stitch the top closed. As Sarah points out at Repeat Crafter Me, when you sew it shut, it makes a natural dip in the middle and the ends poke up, which look perfect for owl ears! She has some excellent pictures to show how to do that part.
If you've never crocheted in the round before and would like a tutorial, click here to see my tutorial. Normally, I really don't like working with single crochet because it takes FOReva to work up and the stitches are really hard to see and, therefore, hard to count. But, I really wanted our little lady to be as pretty as can be, and knew the single crochet was the way to go so none of her insides could be seen.
The body is worked with 6 increasing rounds, then just one SC in each space until it's as tall as you want it to be. If the base of just 6 rounds feels small to you, just continue adding those increasing rounds until you like it.
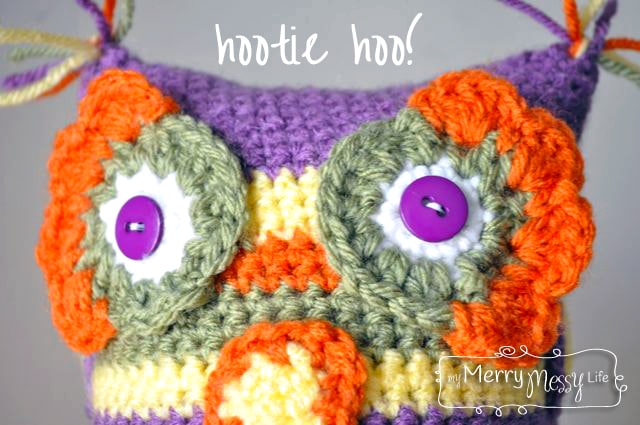
Free Crochet Owl Pattern
Supplies
- Hook: G (4 mm)
- Yarn: Red Heart Super Saver Yarn in Carrot, Lemon, Light Sage, Medium Purple, Coffee
- Tapestry needle to sew
- Fiberfill or other type of stuffing
- 2 matching buttons
Abbreviations
- SC = single crochet
- SL ST = slip stitch
- CH = chain
- DC = double crochet
- HDC = half double crochet
The Body
**It really helps to mark each round with a stitch marker since it is very hard to see where you start and end with the single crochet. Just use a piece of contrasting colored yarn.
CH 3, join with a SL ST to form a circle
Round 1
CH 1 (counts as first SC), 5 SC in circle, SL ST to top of CH 1 (6 SC total)
Round 2
CH 1, work 1 SC in the same space, then work 2 SC in each SP, SL ST to top of CH 1 (12 SC total)
Round 3
CH 1, work 2 SC in the next space, *1 SC in the next, 2 SC in the next space* repeat from * all the way around, SL ST to the top of CH 1 (18 SC total)
Round 4
CH 1, work 1 SC in the next space, 2 SC in the next space, *1 SC in each of the next 2 spaces, 2 SC in the next space* repeat from * all the way around, SL ST in the CH 1 (24 SC total)
Round 5
CH 1, work 1 SC each of the next 2 spaces, 2 SC in the next space, *1 SC in each of the next 2 spaces, 2 SC in the next space* repeat from * all the way around, SL ST in the CH 1 (30 SC total)
Round 6
CH 1, work 1 SC each of the next 3 spaces, 2 SC in the next space, *1 SC in each of the next 3 spaces, 2 SC in the next space* repeat from * all the way around, SL ST in the CH 1 (36 SC total)
Rounds 7-34
CH 1, work 1 SC in each space all the way around, SL ST in the CH 1 (36 SC total)
Don't sew up the top just yet – wait to finish the eyes and wings first. And you don't have to sew in any tails from the body (YAY!) because they stay hidden inside the owl.
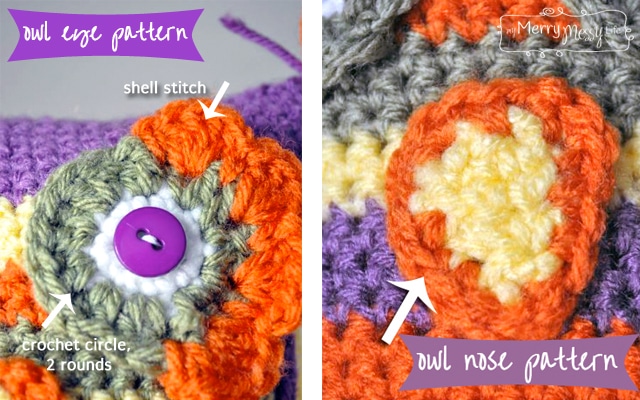
Crochet Owl Eyes & Nose Patterns
With white:
Round 1
Ch 3, SL ST to form a circle, CH 1, 4 SC in circle, SL ST to CH 1 (5 SC total)
Round 2
CH 1, 1 SC in same space, 2 SC in each space around, SL ST to CH 1 (10 SC total)
With a contrasting color: (I used sage green):
Round 1
SL ST and a CH 3 to join, then a DC in the same SP
Work 2 DC in each space around, join with a SL ST to top of first CH 3 (20 DC total)
Fasten off, but leave a long tail to sew it in when finished with the eyelashes.
Crochet Owl Eyelashes Pattern
With a different coordinating color (I used Carrot), pick any spot on the eye to start, doesn't matter where. Attach with a SL ST and a SC in the same space.
Then work the shell stitch – work *4 DC in the next space, then 1 SC in the next* repeat 3 more times (or until about halfway around the eye, 4 total shells). Fasten off and sew in ends.
Make two and sew them onto the body using the tapestry needle. Then, sew the button in the middle when finished.
Nose
(Just a simple triangle using a SC decrease. For my tutorial on increasing and decreasing in crochet, click here. To make the nose larger, just add more chains at the beginning and more rows.)
CH 6
Row 1
In the 2nd CH from hook, work 1 SC and in each CH all the way down (5 SC total)
Row 2
CH 1, work 1 SC in the first two spaces, then work a SC decrease in the next 2 spaces, then 1 SC in the last two spaces. (4 SC total)
Row 3
CH 1, work 1 SC in the first space, then 1 SC decrease in the next 2 spaces, then 1 SC in the last space. (3 SC total)
Row 4
CH 1, work 1 SC in the first space, then 1 SC decrease in the last 2 spaces (2 SC total)
Row 5: Ch 1, work 1 SC decrease in the last 2 spaces (1 SC total)
Fasten off and tie in ends.
Border
work 1 SC in each space around in a contrasting color. Fasten off and leave a tail for sewing in.
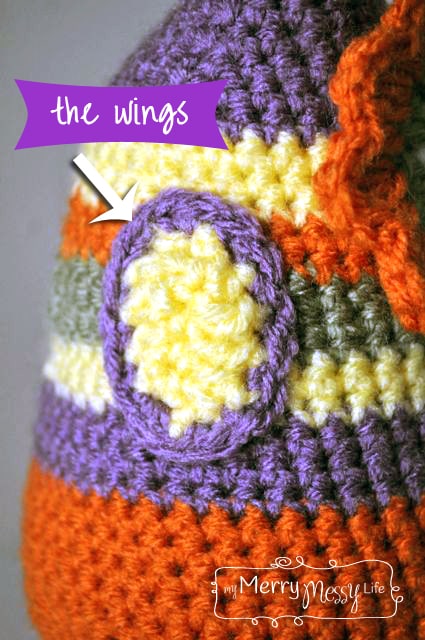
Crochet Owl Amigurumi Pattern – The Wings
To make the wings with this crochet owl amigurumi pattern, you'll need to work a chain of 6 foundation crochet stitches (if you've never done a foundation stitch, see my tutorial here.). Alternatively, you could just work a chain of 8, and a row of 6 HDC all the way down.
Then, working from that chain, CH 2 to start a new row. work 1 SC, 1 HDC, 1 DC, 1 DC, 1 HDC, 1 SC, turn and work the same pattern on the other side. Fasten off and sew in ends.
Attach a contrasting color with a SL ST and a CH 1, and work 1 SC in each space around. Fasten off and leave a tail to sew onto the owl body.
Once everything is sewed on, fill ‘er up with fiber fill and whip stitch the top closed! Then take a couple of strands of yarn, cut about 2 inches long each, and thread them through one by one at the tip of the ears, then tie one big knot with all the pieces.
She's finished!
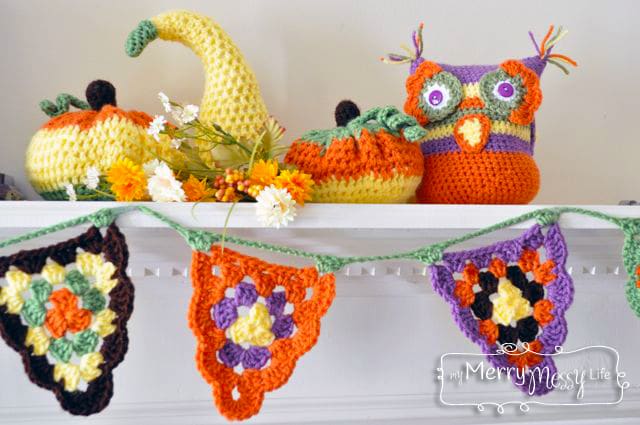
Here are the free patterns for the super easy pumpkins and granny triangle bunting. Be sure to see the completed mantel project, too!
